首先创建 SpringBoot 工程,添加 SpringSecurity 依赖,如下:
<dependency>
    <groupId>org.springframework.boot</groupId>
    <artifactId>spring-boot-starter-security</artifactId>
</dependency>
<dependency>
    <groupId>org.springframework.boot</groupId>
    <artifactId>spring-boot-starter-web</artifactId>
</dependency>
|
如果想将用户名密码通过 JSON 的方式进行传递,则需要自定义相关过滤器,通过分析源码我们发现,默认的用户名密码提取在 UsernamePasswordAuthenticationFilter 过滤器中,部分源码如下:
public class UsernamePasswordAuthenticationFilter extends
AbstractAuthenticationProcessingFilter {
public static final String SPRING_SECURITY_FORM_USERNAME_KEY = "username";
public static final String SPRING_SECURITY_FORM_PASSWORD_KEY = "password";
private String usernameParameter = SPRING_SECURITY_FORM_USERNAME_KEY;
private String passwordParameter = SPRING_SECURITY_FORM_PASSWORD_KEY;
private boolean postOnly = true;
public UsernamePasswordAuthenticationFilter() {
super(new AntPathRequestMatcher("/login", "POST"));
}
public Authentication attemptAuthentication(HttpServletRequest request,
HttpServletResponse response) throws AuthenticationException {
if (postOnly && !request.getMethod().equals("POST")) {
throw new AuthenticationServiceException(
"Authentication method not supported: " + request.getMethod());
}
String username = obtainUsername(request);
String password = obtainPassword(request);
if (username == null) {
username = "";
}
if (password == null) {
password = "";
}
username = username.trim();
UsernamePasswordAuthenticationToken authRequest = new UsernamePasswordAuthenticationToken(
username, password);
setDetails(request, authRequest);
return this.getAuthenticationManager().authenticate(authRequest);
}
protected String obtainPassword(HttpServletRequest request) {
return request.getParameter(passwordParameter);
}
protected String obtainUsername(HttpServletRequest request) {
return request.getParameter(usernameParameter);
}
}
|
从这里可以看到,默认的用户名/密码提取就是通过 request 中的 getParameter 来提取的,如果想使用 JSON 传递用户名密码,只需要将这个过滤器替换掉即可,自定义过滤器如下:
public class CustomAuthenticationFilter extends UsernamePasswordAuthenticationFilter {
    @Override
    public Authentication attemptAuthentication(HttpServletRequest request, HttpServletResponse response) throws AuthenticationException {
        if (request.getContentType().equals(MediaType.APPLICATION_JSON_UTF8_VALUE)
                || request.getContentType().equals(MediaType.APPLICATION_JSON_VALUE)) {
            ObjectMapper mapper = new ObjectMapper();
            UsernamePasswordAuthenticationToken authRequest = null;
            try (InputStream is = request.getInputStream()) {
                Map<String,String> authenticationBean = mapper.readValue(is, Map.class);
                authRequest = new UsernamePasswordAuthenticationToken(
                        authenticationBean.get("username"), authenticationBean.get("password"));
            } catch (IOException e) {
                e.printStackTrace();
                authRequest = new UsernamePasswordAuthenticationToken(
                        "", "");
            } finally {
                setDetails(request, authRequest);
                return this.getAuthenticationManager().authenticate(authRequest);
            }
        }
        else {
            return super.attemptAuthentication(request, response);
        }
    }
}
|
这里只是将用户名/密码的获取方案重新修正下,改为了从 JSON 中获取用户名密码,然后在 SecurityConfig 中作出如下修改:
@Override
protected void configure(HttpSecurity http) throws Exception {
    http.authorizeRequests().anyRequest().authenticated()
            .and()
            .formLogin()
            .and().csrf().disable();
    http.addFilterAt(customAuthenticationFilter(), UsernamePasswordAuthenticationFilter.class);
}
@Bean
CustomAuthenticationFilter customAuthenticationFilter() throws Exception {
    CustomAuthenticationFilter filter = new CustomAuthenticationFilter();
    filter.setAuthenticationSuccessHandler(new AuthenticationSuccessHandler() {
        @Override
        public void onAuthenticationSuccess(HttpServletRequest req, HttpServletResponse resp, Authentication authentication) throws IOException, ServletException {
            resp.setContentType("application/json;charset=utf-8");
            PrintWriter out = resp.getWriter();
            RespBean respBean = RespBean.ok("登录成功!");
            out.write(new ObjectMapper().writeValueAsString(respBean));
            out.flush();
            out.close();
        }
    });
    filter.setAuthenticationFailureHandler(new AuthenticationFailureHandler() {
        @Override
        public void onAuthenticationFailure(HttpServletRequest req, HttpServletResponse resp, AuthenticationException e) throws IOException, ServletException {
            resp.setContentType("application/json;charset=utf-8");
            PrintWriter out = resp.getWriter();
            RespBean respBean = RespBean.error("登录失败!");
            out.write(new ObjectMapper().writeValueAsString(respBean));
            out.flush();
            out.close();
        }
    });
    filter.setAuthenticationManager(authenticationManagerBean());
    return filter;
}
|
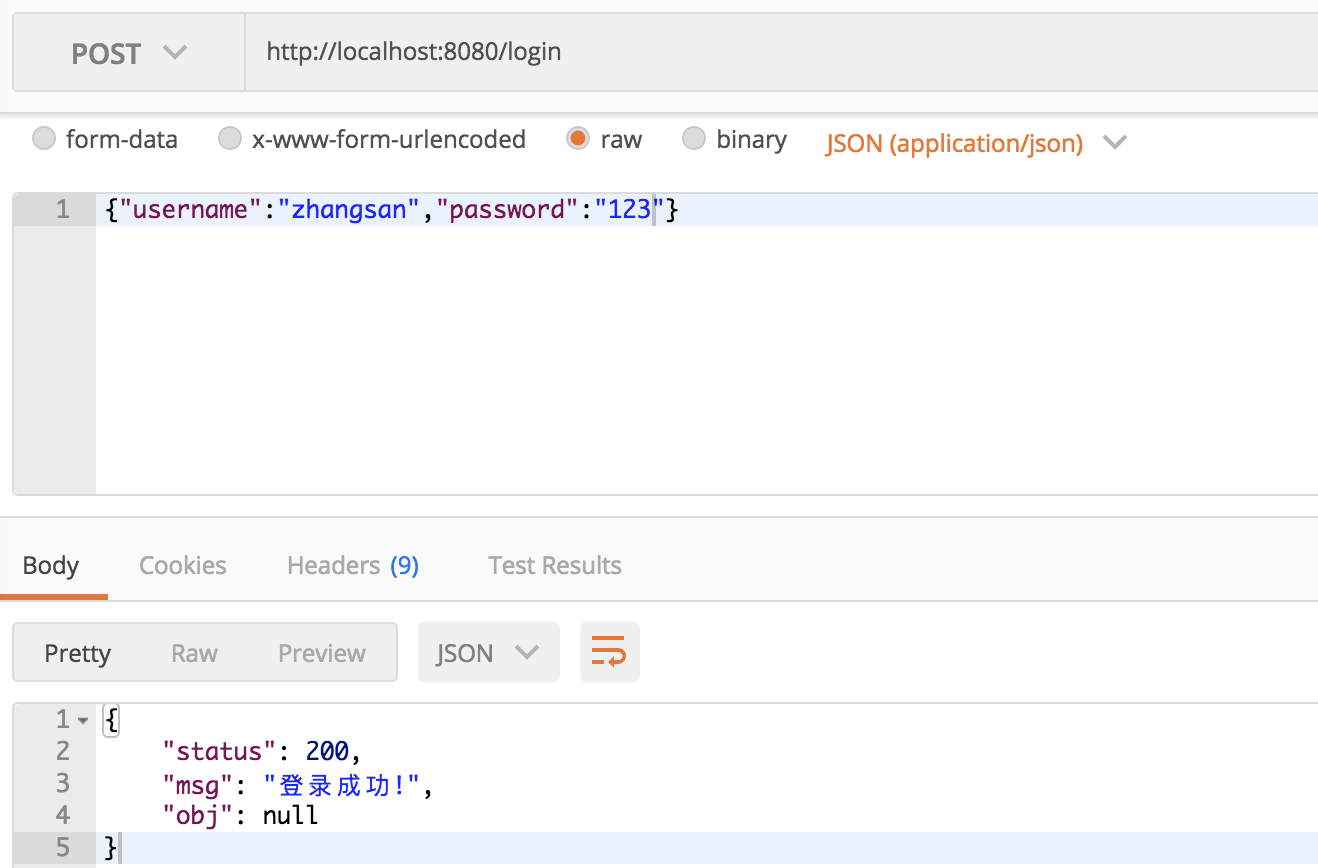
将自定义的 CustomAuthenticationFilter 类加入进来即可,接下来就可以使用 JSON 进行登录了,如下: